Showing posts with label Quilting Quirks. Show all posts

Tuesday, February 3, 2015

#CreativelyInspired

At the start if 2015 I knew I wanted to focus on being creatively inspired. It's not that I haven't been inspired in the past, I just decided that I would live each day open to the chance to be creatively inspired. Whether its the color of the flowers in front of my son's school, the design on the shirt of a random stranger in the grocery store or taking something and using it in a new and different way.

Living life more creatively helps keep the boredom caused by the repetition of daily life at bay. Earlier today I was watching an episode of Heros on Netflix and one of the characters was in the kitchen with a grey, yellow and white dish towel and for some reason the pattern caught my eye and I made a quick note of it in my quilting notebook. I may use it in a quilt one day, I may not, but it caught my attention.

Yesterday, recieved a package from Quiltsmart with some panels I needed for projects in progress. Inside they had included some extra panels from various Quiltsmart patterns or ZigZapps and I spent about an hour this morning sorting through and trying to decide on some quick projects to do.


Inside the scrap pack, was a partial panel of Mary's Flower Garden. It looked like they needed one flower from it for a project or something so I had 5 flowers to work with.

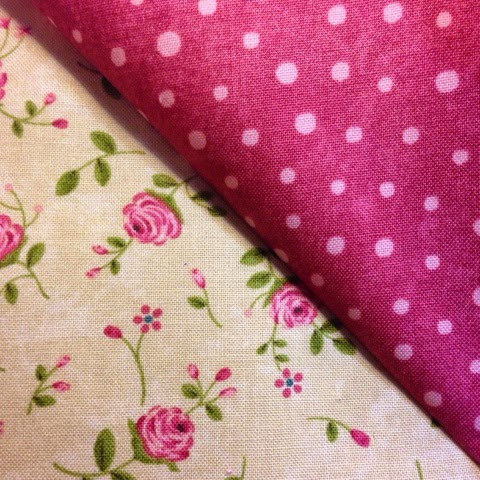
I've really been going through a "French Colonial" phase, or shabby chic, depending on my level of relaxation. When I got home after work, I dug through my fabric and found this beautiful yellow floral by Robyn Pandolph that I had been saving for a "special" project because there wasn't a lot of it.


After getting the Lil Monkey settled into a Lego project and doing some cleaning in the ktichen, I sat down at my sewing machine and whipped up a proejct in no time. Within two hours I had 4 flowers and all the fabric cut that I needed to make a summer-inspired table topper.  I just need to sew it all together. Hopefully, I can get some time one day this week to finish it up. Life has been a little busy lately. 


I love that it is so easy to try different backgrounds. This green was really pretty as well, but I just love the floral fabric.


Well, I'm off to clean up my work space ... a maybe find a little bit of inspiration in that pile of fabric. I hope every day you too look for ways to stay #creativelyinspired.

Until our next cup of tea ...


Monday, January 26, 2015

A Weekend Project: Playing with Pinwheels

This weekend I wanted to work on a quilt project, but was really not inspired to work on on anything I had on the table, so i looked around for a quick project. Usually, that means that I dig through my bin of Quiltsmart ZigZapps!, but this time I pulled out two Rambling Rose by Moda charms packs I'd gotten at their end og the year sale. It was just enough to do something new and small enough to finish.

I perused my quilt pins on Pinterest and decided to finally get over my (irrational) fear of triangles, so I decided to do a pinwheel table topper. I sorted through the teals, pinks, brown and tan 5-inch squares and matched them up to make pairs for the pinwheels. I paired each pink with a tan and each teal with a dark brown. I had two 5-inch squares of each fabric and matched the same fabrics together. 

I know that pinwheels are easy, but just in case you haven't made any, here is the simple method I used.


First, I flipped over one in each pair (the pink or the teal) and drew a diagonal like from top to bottom like this.


Then I pinned each marked square with its mate, right sides together, on either side of the line.


At the sewing machine, I used the line as a guide and sewed 1/4 inch on each side of the line. After each one was sewn on each side of the line I cut the pairs apart on the line, creating two half-square traingles, a little larger than 4 1/2 inches each. (Not shown.)


Afterwards, I had 4 half-square traingles of each of the fabric pairs.


I trimmed each one down to the next half-inch. Unfortunately, I was watching my little guy play in the back yard and cutting the squares in front of our big picture window and cut a few sets at 4-inches before realizing my mistake, so then I just made all of them 4-inch squares.


Once I had the sets of half-square triangles, I flipped them all sorts of ways to see what my choices were, but this time I stayed with my original plan and decided to make pinwheels. 


I sewed them together and soon had 16-pinwheels ready to be put together. 


I'll show you the finished tabletopper later. I am hoping to use it for a feature story I am writing for TEAinTEXAS' summer issue.

This was a quick and easy project. If it wasn't for our sewer line breaking, unexpected out of town family stopping by for a visit, vehicle maintenance and birthday dinner out with friends, I would have been able to finish it in one weekend!!

Until our next cup of tea,


Thursday, January 15, 2015

The Heart of the Kitchen

OMG! We are only a few weeks away from Valentine's Day!! It's actually an exciting time for me because we recieved an early Valentine's Day present 5 years ago. Our Lil Monkey was born on Feb. 9, and then of course next week is my birthday so it's actually a bit of a whirlwind couple of months for us.

So of course, I'm getting an early start on pink projects!! 

On Saturday, I told you about an accidental project that I stumbled upon while making a mistake on this project. While I said I'd show the finished one of that one with this, I don't quite have it ready. Sorry, but hopefully, this makes up for it.

I wanted to make some quick projects and Quiltsmart ZigZapps! are the easiest way to do that, so I dug around in my stash and found some pink fabric and Sweetheart ZigZapps! A little stitching and flipping and I whipped up this kitchen towel!


A few friends have asked me if the Quiltsmart ZigZapps! are really as easy as I say. So let me walk you through how I do them.

First, I cut around the border of the ZigZapp! Then pin it to the right side of the fabric with the textured fusible side towards the fabric.


Then I stitch on the solid line.


I cut out the stitched piece on the dotted line, then carefully cut out the inset ZigZapp! if there is one. If there is a dotted line in the center, like the small heart, I cut on that line before sewing.


Then carefully flip the fabric so the rightside is facing out and the printed interfacing is on the back with the textured fusible side facing out.


I lay the turned piece on an Applique Pressing Sheet or Grip-n-Press by Bear Thread Designs with the interfacing on the craft sheet and iron it flat. This will prevent the fusible from transferring to my work surface.


Next I lay it on the background fabric and iron it down. The fusible will tack it down to the fabric, but depending on the fabric, like this textured towel I sometimes need to pin it.


Then stitch it stitch it down. Now, usually I stitch it to the background fabric with clear thread using a zigzag stitch, however this one I wanted to have a white stitched line show. The you finish your project as planned.


See, easy peasy! It took me less than an hour to make this, with 4 "life crisis" interruptions from a 4-year-old and taking pictures of each step. Now, it's your turn! Let me know when you try a project, I'd love to see it!

Until our next cup of tea ...


Tuesday, January 13, 2015

Happiness is Hexagons!!

This past weekend, I was able to spend a little time working on a project that I am using Quiltsmart Hexagon ZigZapps! to make it. While I won't be posting this project for a while, I have to say these Hexagon ZigZapps! are super easy and very fun!

They come in 3 sizes, 2-inch, 1.5-inch and 1-inch and i am overflowing with ideas as I sew these quick little hexes. I can assure you, I have looked at hexagon quilts for years and loved them. For years I have stressed about how hard triangles looked, so I didn't even want to think about these little six-sided bundles of potiental tears. 


The technique that Mattie at Quiltsmart has designed is simple, you place your printed interfacing on the right side of the fabric, sew around the sewing line, trim on the cutting line and then flip inside out (you cut a slit in center of interfacing - I do it before sewing so I don't cut my fabric.) It's literally as easy as turning my kid's socks right side out, and less smelly! Most of the Quiltsmart ZigZapps! use this technique or a version of it and I am addicted!  

I had a lot of fun and in no time, I had a pile of each of these sizes sitting there waiting to find their place in the project. (The pink is actually the above color, my phone flashed on the photos below.) I can honestly say, I will not do hexagons any other way! (Sits on hands to show my resolve and commitment!)


If you've wanted to try hexes but were too scared, or if you've given up after other techniques, take a deep breath and try these. You'll be happy you did!

Until our next cup of tea ...


Monday, December 22, 2014

Inspiration is Everywhere

I'm having a bit of quilting withdrawals, though it partially for a good reason. Last week our little family joined my brother and his family, and my mom and stepfather for a 5-days cruise, so that's why the blog has been a little quiet. Our dear neighbors collected our mail and packages while we were away and brother them over when we got home. I went to tuck the "Santa" gifts and other things away in the craft room and the light blew when we went in there. So while the packages are safely tucked away, I cannot do any sewing until Hubby can fix the light (I am too short to reach even on a ladder because it is recessed lighting.)

I was even proactive, but cutting and sorting projects at the beginning of the month because our families are really big on making homemade gift baskets and I needed the cutting table to put them together. {sigh} I guess I'll just be happy I can work on some stitching projects.

Earlier today I was chatting with Quiltsmart Mattie via text about some inspiration that I saw on a quilt blog that would look great with the Quiltsmart Dahlia. It got to me thinking about the random photos I take because I think it would be a unique quilt pattern, or color combination or just because I was inspired in that moment. 


Take these tiles at Lowe's. I am coordinating my son's class's annual Art Auction project this year and I saw these and thought it would be fun to try a similar project using Quiltsmart's Hexagons.


I saw this pink rose when my husband and I snuck away for lunch one day and thought the pinks would be amazing in a Quiltsmart Lonestar. (Can you tell that this A Year of Quiltsmart project is not just a part of my creative time? I'm a little obsessed!) 


When we were on the cruise, my husband and I took my son to the Dr. Seuss "Green Eggs and Ham" Breakfast. I thought maybe I'd push myself out of my comfort zone one day and try a red and aqua/teal combo. That would be WAY outside my comfort zone, color-wise.

I hope that I never stop seeing creative "inspirations" in everyday life. Even if I never get to see all the ideas created, it still makes life "colorful" to imagine all the possiblities. 

Until our next cup of tea ...


Thursday, December 4, 2014

Mommy Humor: When the Crib is Outgrown

Every mommy knows there are a few guarantees in raising children, one of those being that kids will grow. Now there are lots of reasons for keeping stuff beyond its usefulness ...

1. Save it for future children
2. It's still in good condition and throwing it away would be a waste.
3. Hadn't gotten around to taking it to a donation site or give to someone with a child younger.
4. (My weakness) "It was my baby's and I can't part with it!"

Well, last night, something I hadn't gotten around to getting rid of came to good use - in an unconventional way. 

My mom came over to pick up some stuff and help me with my (Quiltsmart) Lone Robin border for the next meeting for the Round Robin group. 

In my creative area of our office space, I have Lil Monkey's crib mattress leaning against the wall. I've offered it to 3 soon-to-be moms, who didn't need it for one reason or another. 

So last night, while trying to decide what fabric to use for a border, we tried laying it out with different fabrics and borders I'd been working on to see what combos would work best. While looking for a place to lay it out, my mom saw the mattress and said, "Can we pin it to that?" Laughing, I agreed. 

So, just like that, I suddenly had a display work surface. I'm really going to miss it when we finally get around to getting rid of it.

(** Note: this was not the border chosen for the next meeting. This border is the Diamond Border, part of the Smart-ease series. I absolutely love it!!! I'll post a photo after I reveal at the meeting on Sunday.)


Until our next cup of tea ...


Tuesday, November 18, 2014

Life and Crafts: A Balancing Act

What a busy weekend we had! It's been a few days since my last post because we really ran around a lot this weekend. Lunch with my parents, trip to a quilt shop where Grammie got to show off the No. 1 Grandchild to her friends, a trip to the store to start our first ever holiday village, with A LOT of input and advice from the littlest among us. Who knew he was such an expert!?!

I was able to get some work started on a variety of projects this weekend, including some work on the next border row for my Lone Robin which is Quiltsmart inspired this year. I can't show you what I am doing, but I can tell you that I am excited about the technique that I am using for this border.


I actually spent a little time throughout the past few days conversing with Mattie and Quiltsmart Mandy about project notes and ideas. So inspirational when you find friends who share the same interests and passions.

There was so much going on event through yesterday and this morning that I am only now getting to sit down and write it all down. In fact, I am sitting here with a fireside seat at La Madeleine, ready to write a book, but I only have time for a blog post or two. Mmm, this tomoato soup is amazing ... Oh, right. I'm on a time limit!!

I also made some Christmas ornaments this weekend and will post as soon as I take photos.

This time of year is filled with so much inspiration everywhere! The past few weeks I have been out delivering the Winter Issue of TEAinTEXAS and I have visited about 5-7 antique shops a week. Just this morning, I visited an antique shop and found a lost treasure that will eventually find a home at my mom's house, but I'll tell you all about it before then.

My list of Quiltsmart projects is growing, but still manageable. There are some quick projects that I will be showing finished soon, and some that will take a little bit more time as my calendar fills with holiday activities. 

Until our next cup of tea ...


Friday, November 7, 2014

I'm Not a Stalker ... I'm a Fangirl

I admit it, I was that teen girl who rolled her eyes when the others squealed over magazine stories of New Kids on the Block, I sighed deeply and wondered at the future of America when I saw a girl cry because she got tickets to the NSync concert and even now, I tease my niece when she does the same over 1 Direction and the other current boy bands. It's not that I didn't love their music as any others of my generation, I just knew they put their pants on one leg at a time like the rest of the world. 

Over the years that same ability to overcome "celebrity" awe was put to the test. As a journalist and Public Affairs Office staff member at military installations, I interviewed and escorted celebrities such as Aaron Tippin, Miranda Lambert, Destiny's Child and Gary Sinise (that one almost made my resolve crack and my knees buckle.)  It helped that my first interview ever for the Army PAO was a one-star general who was down to earth and make jokes to put me at ease when he heard it was my first story ever for the military installation.

But then, Quiltsmart came along and all that came tumbling down. I mean, I'd been there when a President visited and another time a First Lady, but this is Quiltsmart!! 

I have to admit, when my mom, who is a semi-celebrity in the quilting industry herself, first introduced me to Quiltsmart because Bear Thread Designs and Quiltsmart were working together on various projects, I was as hestiant as any other quilt teachnique or tool she'd shown be before. When your mom has the standing in the quilting community that mine does, you are either extremely well versued in sewing and quilting or you're hesiatant and unsure because she makes it look so easy and you're all thumbs ... and I am the latter. Sometimes I will ask her a question and the answer is half filled with sentences I don't understand. And I think, "I should know what she is talking about, it's been 20 years!"


So my first Quiltsmart projects were Wine Shades and small things using ZigZapps! I mean, seriously, even I can't screw up a ZigZapp! But when I worked at Bear Thread Designs, my mom would send me home with projects to do from home, like a 58" Lonestar and soon I was hooked. I mean, I trudged through her projects knowing I would only do a paortion of it before turning it over to her to finish for a BTD sample, but oh, boy, did I dream big!

I made lists of projects that I wanted to do, made extensive drawings a designs using Quiltsmart interfacing ... eventually I had a whole binder dedicated to these projects. Projects, patterns, color schemes and more. That list is what led me to deciding to start the "A Year of Quiltsmart" Project. There were so many things I wanted to do and I'd be halfway through a project when I'd get so excited about a new inspiration, that I'd start another.

Just when I thought Quiltsmart couldn't get any better,  I met owner, Mattie ... and Steve. While Mattie is the heart and inspiration behind Quiltsmart, Steve is the encouraging force and sounding board, telling Mattie that if she can dream it, they'd work to make it a reality.

Quiltsmart just makes everything so much easier. I mean to be able to actually start a project and finish it and then stand back and say "Wow, I never thought I could do that, but I did!", has a powerful impact on your project motivation. Pinterest is filled with people who "pin" things they want to do, but know they will never have the courage to try. Quiltsmart is that courage in the form of soft little sheets of printed interfacing. I don't even like traingles and I am working on a hexagon project right now! (As my little one would say in a botched British accent, "What!?! What!?!)

So I guess, I owe apologies to all those girls I rolled my eyes at or pretended to gag when they fell into turmoil over a boy band or celebrity, because I have become one of them. I'm not a stalker, I'm a fangirl. And the reality is, if Quiltsmart had a fanclub, I'd be the president. Is it wrong to want a t-shirt professing my status as a "Quiltsmartie"?

Well, those hexagons won't sew themselves. Until our next cup of tea ...

Tuesday, November 4, 2014

Round Robin Review


You may remember my post in September about starting my second Round Robin. This year, I am not passing my quilt along, but rather adding each border myself, holding with my theme for the year of "A Year of Quiltsmart". Therefore, I have been labeled a "Lone Robin". I feel like a rogue undercover agent or something.


So you may remember my medallion (center) was a red and green Princess Feather, a retired design by Quiltsmart. For the second row, I used the Watercolor Interfacing (provided in original Princess Feather pattern). I cut 2.5 inch squares and ironed to interfacing then sewed top to bottom, followed by left to right.


After the squares were sewn, I cut them in half across the white part and sewed them onto the medallion, turning it "on point". This was actually the first time I had ever turned a quilt "on point" so I was a bit more excited than a normal person would be (but I never claimed to be normal).

I am really excited about how this project is turning out. Our next meeting is early December, so I need to get started on the second row, which is partially cut. I can't wait to see how it turns out. I'll check in soon wiht updates ...

Until our next cup of tea ...